Unreal Engine 4 虚幻引擎学习笔记(四)
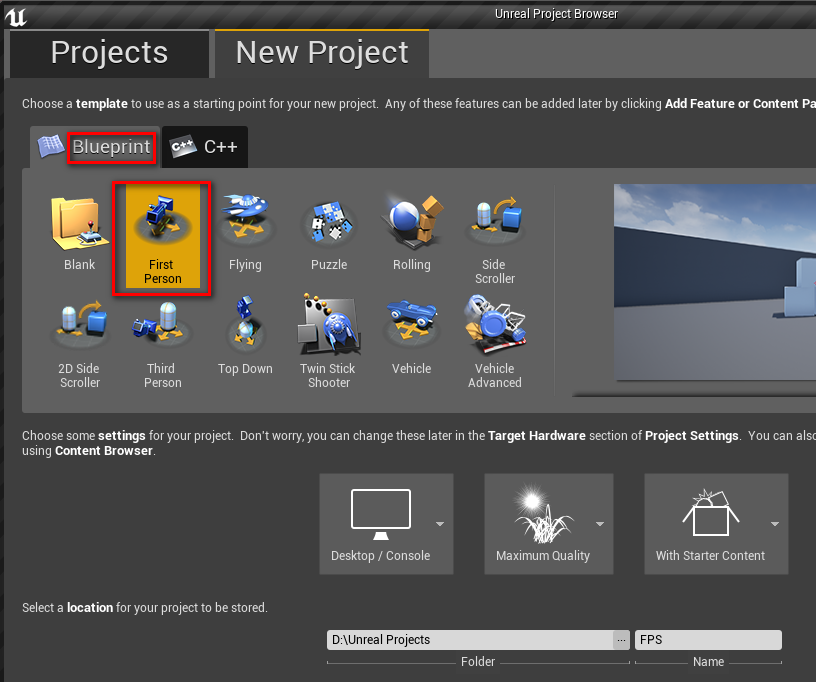
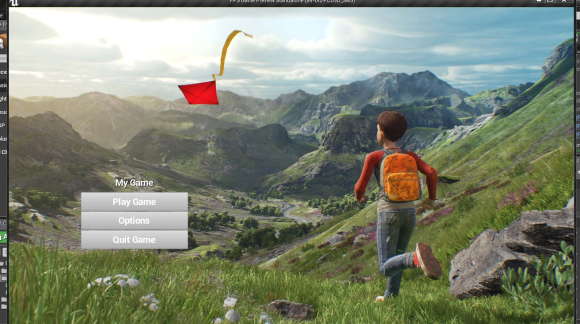
玩转C++之前还是先熟悉下blueprint吧~来做个小型FPS(First-person shooter),照着官网教程写吧,顺便记忆一下:)
刚升了win10 th2,内存管理比之前给力啊,不过GT740M的驱动没啥用,又从NVIDIA下了最新的驱动,估计进桌面慢也是这个原因~UE4又可以快速打开了:)
项目设置

直接复制HUD,再建2个Widget Blueprint,一个叫MainMenu,一个叫PauseMenu.
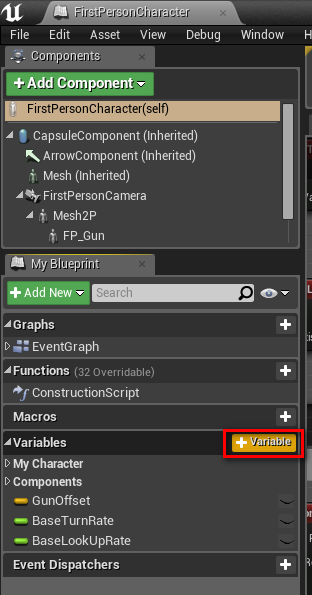
Content Browser里打开First Person Character
路径在Content>FirstPersonBP>Blueprints在My Blueprint窗口新建变量
Health,Float,default value:1.0
默认值要编译后才能修改
Energy,Float,default value:1.0
Ammo,Integer,default value:25
MaxAmmo,Integer,default value:25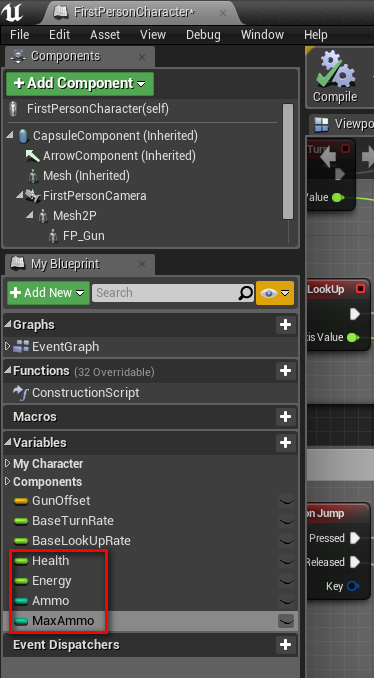
在Event Graph里新建Event Begin Play,结点拖出来后选择
Create Widget,并绑定类HUD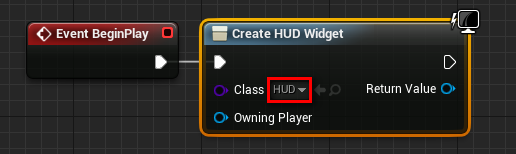
Create HUD Widget的返回值拖出来选择
Promote to Variable并重命名为HUD Reference(这个重命名可以直接在右侧名称里编辑HUD_Reference)
图的含义是:游戏开始时创建HUD Widget Blueprint并将它保存为一个变量,方便之后的操作
拖出set的结点选择
Add to Viewport
这一步就是将HUD显示给玩家
设置Energy逻辑(每跳一次递减0.25)
直接将Energy从My Blueprint拖到Event Graph,一个get,一个set,中间用Float - Float连接,如下: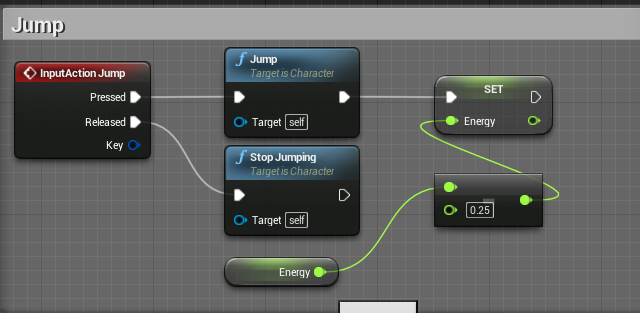
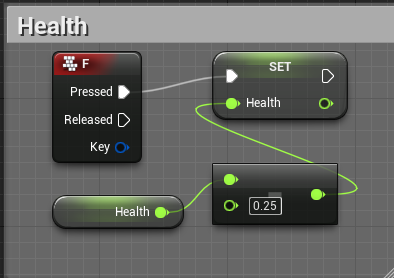
设置Health逻辑(每按一次F键递减0.25)
设置Ammo逻辑(子弹>0时才能开火)
找到Spawn Projectile开头作如下修改: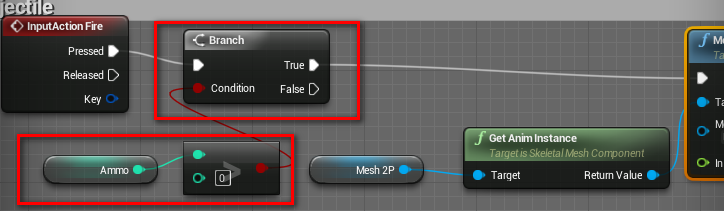
在Spawn Projectile尾部作如下修改: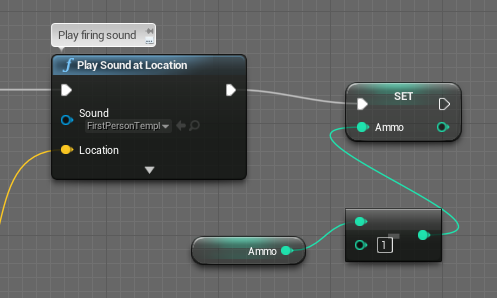
表示每发射一次子弹Ammo减1
编译,保存,关闭
显示Health, Energy,Ammo
这边调的挺纠结的,play和make确实是两码事:(
打开HUD,添加一个
Horizontal Box,在其下方再添加2个Vertical Box,再在Vertical Box下方各添加2个Text,2个Progress Bar,如下图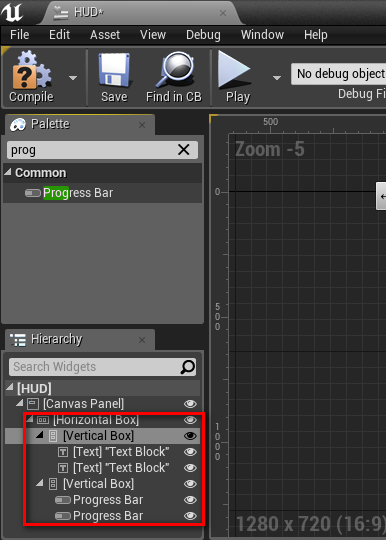
选中
Horizontal Box将其放到左上角,并拖动来改变它的大小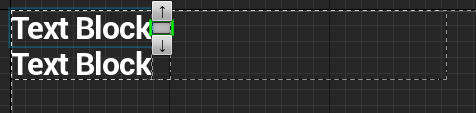
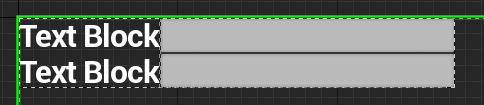
选中2个Progress Bar,在Size里选择Fill,然后上层的Vertical Box,也选择Fill

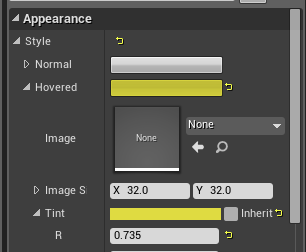
设置Health的progress bar为绿色,Energy的progress bar为橙色

为Ammo条设计UI
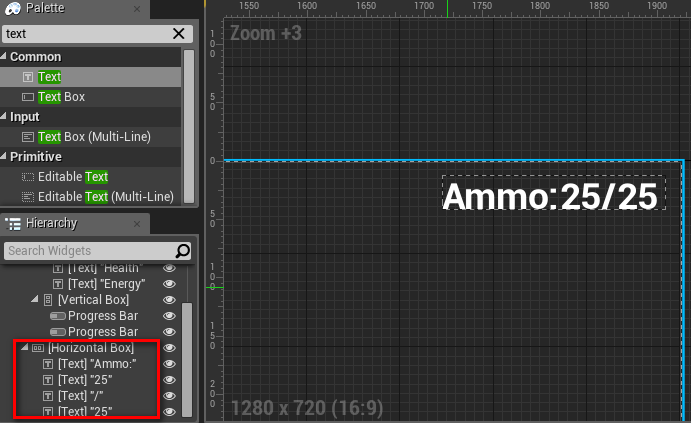 )
)将Ammo的Horizontal Box设为右上角
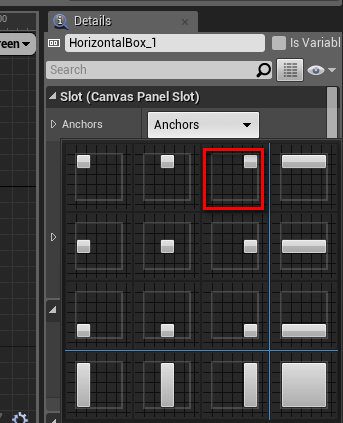
目的是可以自适应屏幕
在UE编辑器的任务栏右上角切到
Graph,并按下图添加结点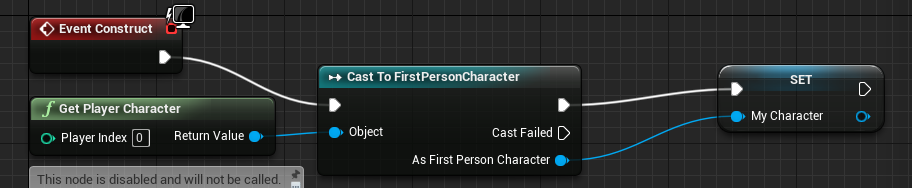
As First Person Character右侧选择Promote to Variable
这个图的含义是:检查玩家角色是否是First Person Character编译,切回
Designer标签,状态条绑定变量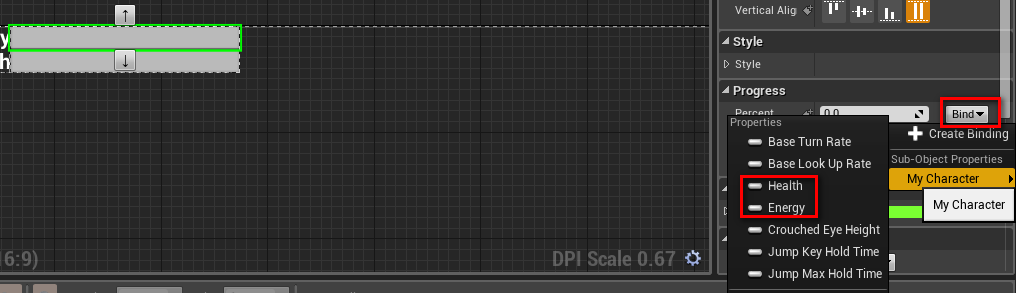
Ammo的25/25绑定变量


- 编译,保存,可以玩了:)
但是血条,能量,子弹为空时并没有任何异常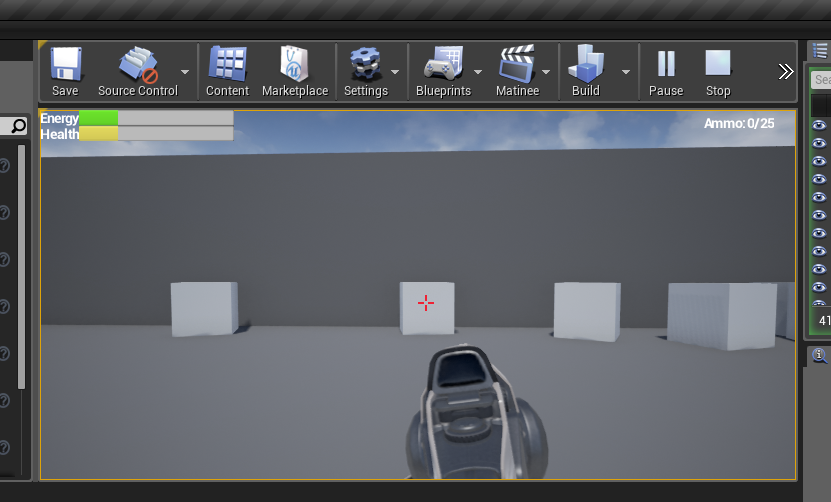
创建Main Menu
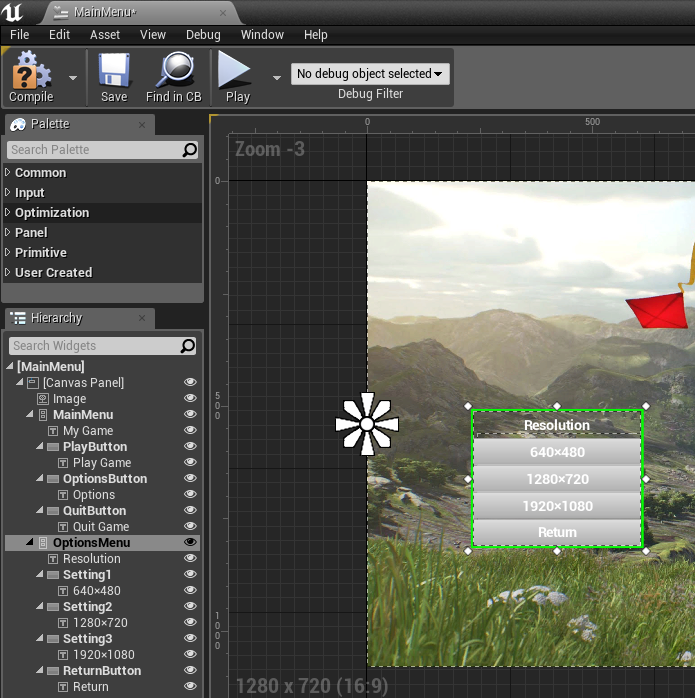
打开MainMenu,按下图添加元素(第二个Vertical Box比第一个多一个button)
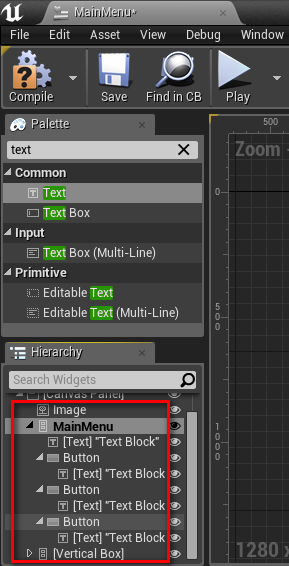
将第一个Vertical Box改名为MainMenu,在右侧勾选
isVariable,设置ZOrder为1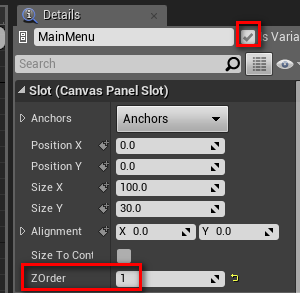
意义是将这个置于图片的上方
第二个Vertical Box改为Options,同理将其它的重命名如下:

选中所有的button,在details面板里调整下Tint的颜色,并勾选
Fill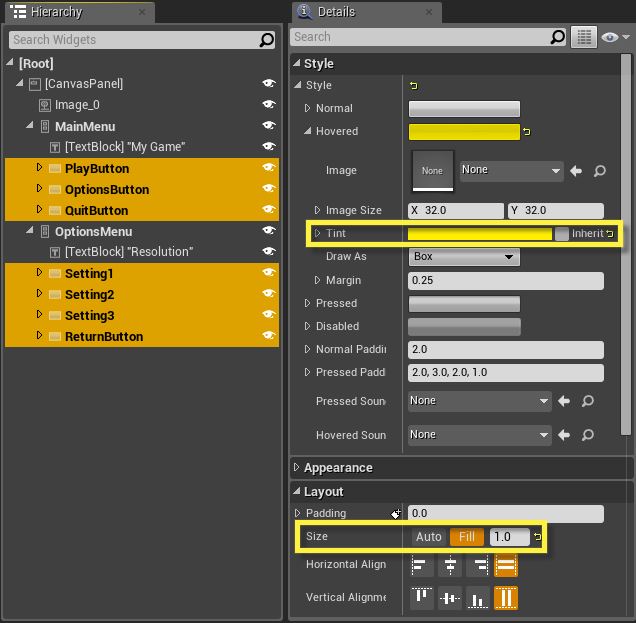
下载 https://docs.unrealengine.com/latest/images/Engine/UMG/QuickStart/3/ExampleBackground.png 导入UE,在Image的Details里选择它
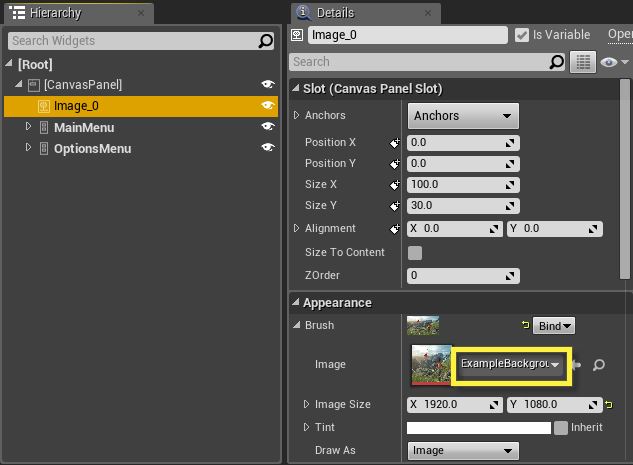
在Designer里将这个图片填满整个区域,并且将Details里的Anchors改为全屏
选中所有的Vertical Box,将Anchors改为
left-center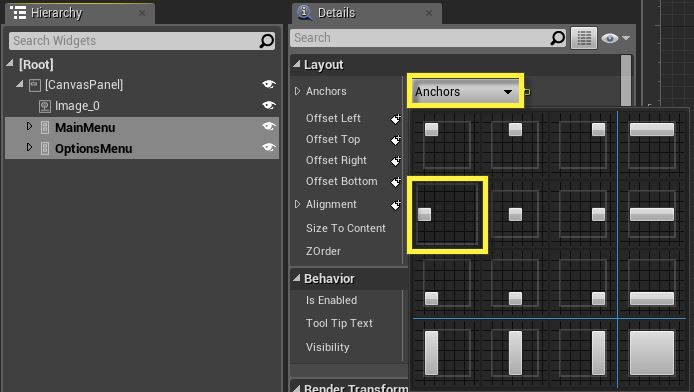
将
OptionsMenu的Visibility改为Hidden
打算通过脚本来显示它调整MainMenu,将其大小改成如下图所示:
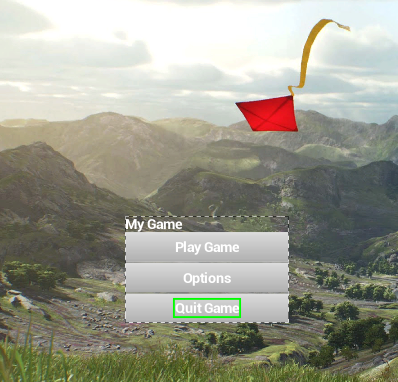
将OptionsMenu和MainMenu重叠
编写MainMenu脚本
在MainMenu里切换到
Graph,如下图操作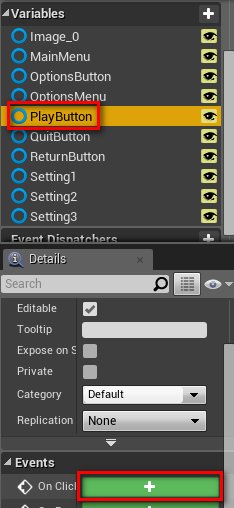
为每个button都添加
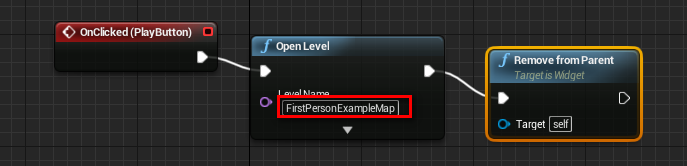
On Clicked事件Onclicked(PlayButton)添加下面的结点
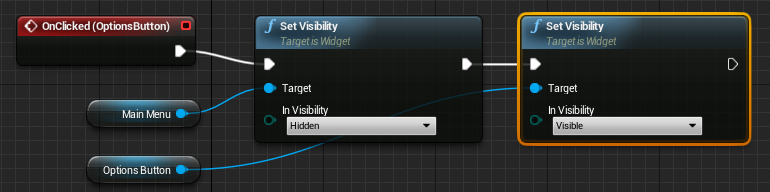
Onclicked(OptionsMenu)添加下面的结点
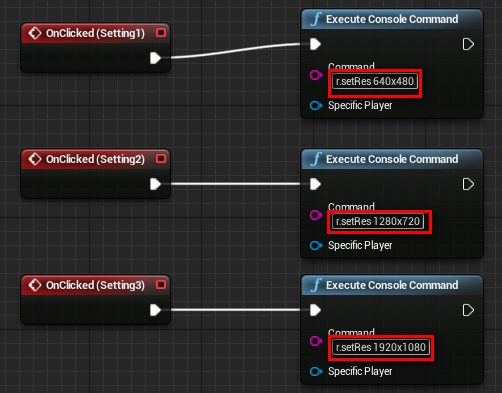
Onclicked(Setting)添加下面的结点
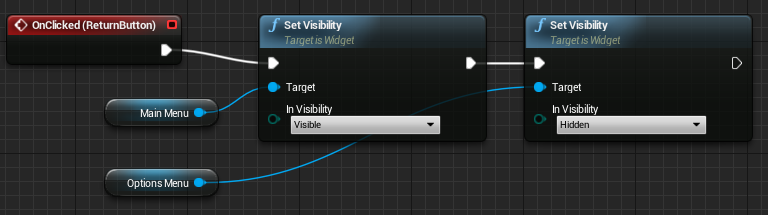
Onclicked(ReturnButton)与Onclicked(PlayButton)相反
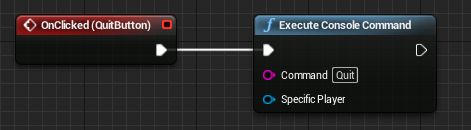
Onclicked(QuitButton)添加下面的结点
编译-保存-关闭
Level窗口中找到
Blueprints,Open Level Blueprint,并添加如下结点
编译,关掉.
打开First Person Character蓝图,在Event Begin Play这一段末尾添加结点
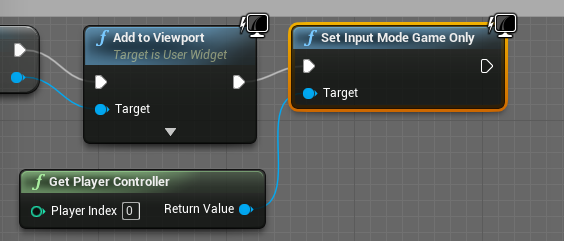
含义是:
This will turn off the cursor and set the input for the player to Game Only
编译,保存,关掉打开Level窗口上方的
Settings,World Settings,按如下设置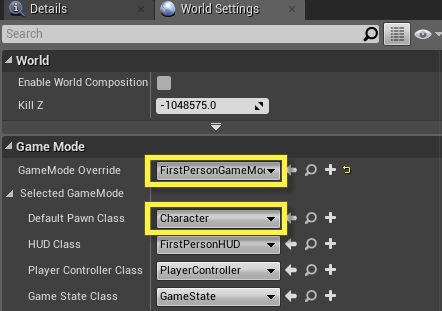
没选FirstPersonCharacter的原因:
as we do not want the player to be able to run around and shoot behind the Main Menu.点击play,可以玩啦:(
被官网文档坑啦,点击Play Game无任何反应,调试了好久,最后在论坛里找到了答案
content In 4.5 if you point the same map, the UMG will disappear. But in 4.6, you don’t need to open the same level as it already open. Just add “Remove From Parent” in Widget blueprint, and it would do the trick.
意思就是在MainMenu蓝图里直接删掉
OpenLevel结点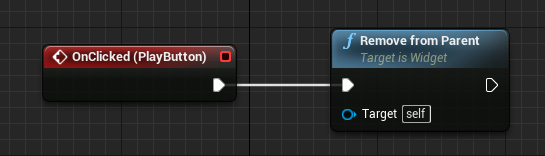
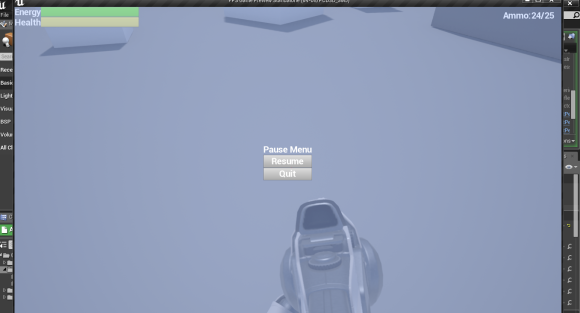
折腾Pause Menu
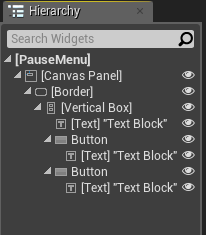
打开PauseMenu蓝图,按下图添加元素
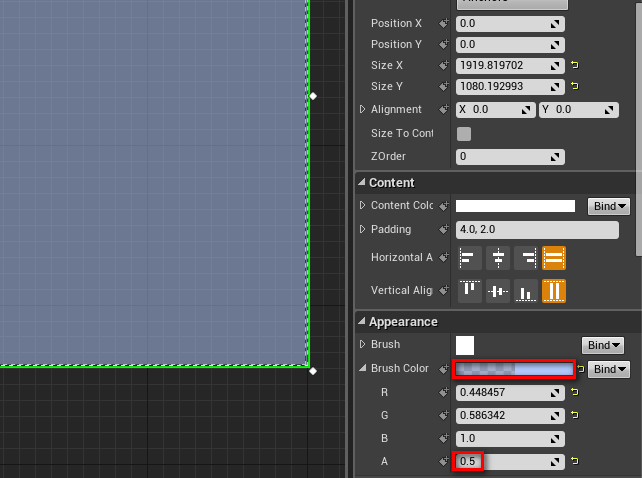
调整border的大小,使其填充整个窗口,并且改一下颜色,A的值改为0.5,这样可以半透明;Anchor也要改为填充
将Vertical Box水平,垂直居中
调整2个button的颜色
切到
Graph标签,为ResumeButton添加点击事件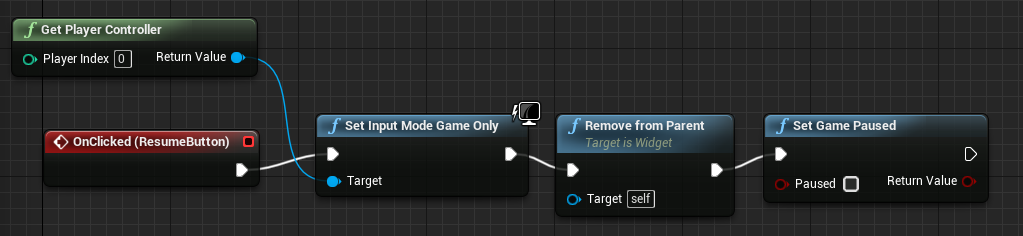
最后个结点没看懂:(
Here when the Resume Button is clicked, the input mode is set to game only and the cursor that is displayed when the Pause Menu is activated is removed. The Remove from Parent node is used to remove the actual Pause Menu widget from display before leaving the paused state by using the Set Game Paused node and leaving Paused unchecked.新建一个function,命名为Remove HUD
目的是remove the game HUD from the player's view when the Pause Menu is activated
并添加如下结点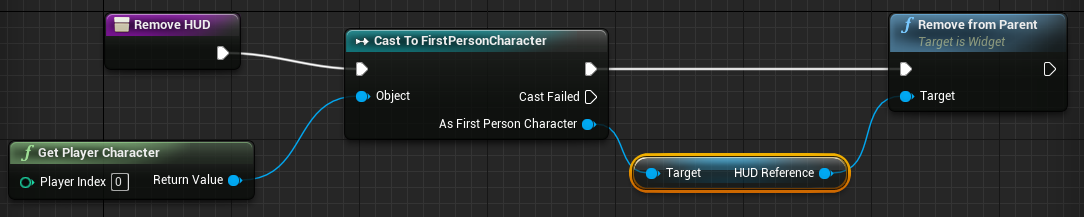
切到
Event Graph标签,为QuitButton添加结点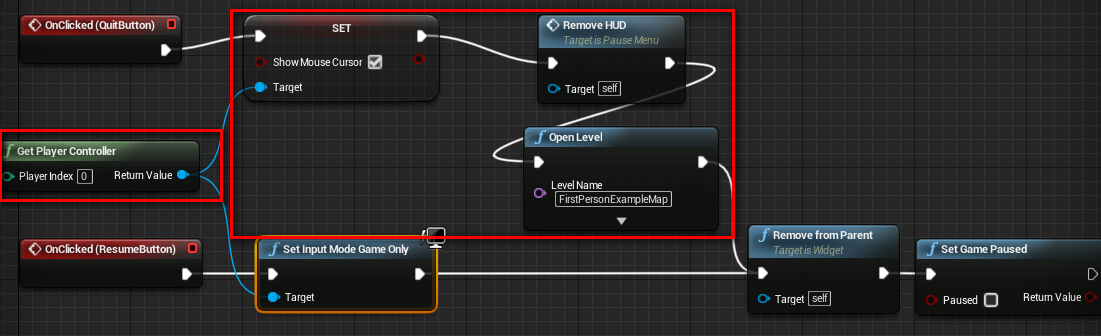
目的:
When Quit is clicked, this will turn on the mouse cursor for menu navigation when returning to the Main Menu
这边反而要加Open Level,为了切回MainMenu打开
FirstPersonCharacter蓝图,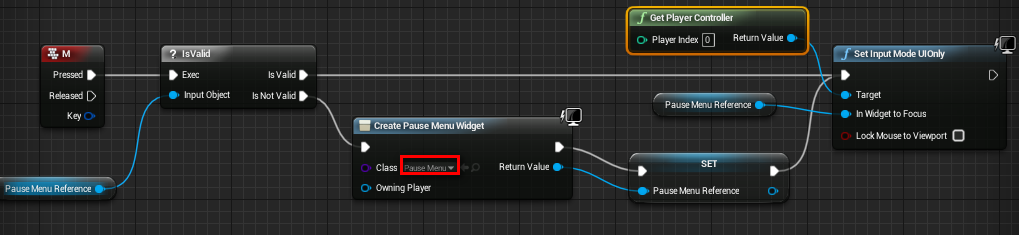
解释如下:
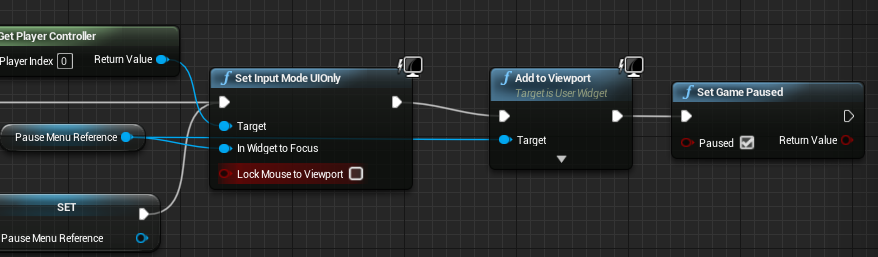
When M is pressed, if the Pause Menu has been accessed before it will not need to create it again and will instead access the variable. If this is the first time the Pause Menu has been accessed it will create it then store it as a variable so it can be access later. In either case, the input mode is set to UI only before we display the Pause Menu (which we will do next).显示Pause Menu
编译,保存,运行.